Data Preprocessing
As outlined in the topic Bone Analysis Workflow, Dragonfly's Bone Analysis module may require a number of pre-processing steps to prepare a sample for import into the module and computation of mappings and morphometric indices. Pre-processing can include reorienting image data, cropping to reduce data size and to isolate a bone of interest, and filtering to enhance data for segmentation.
You can load 8, 16, and 32 bit image data saved in a number of file formats (TIFF, BMP, PNG, RAW, and ORSObject), as well as datasets saved in the DICOM file format. Viewing image data is facilitated with Dragonfly's Manipulate tools (see Using the Manipulate Tools), Window Leveling panel (see Window Leveling), and interactive text annotations (see 2D Views and 3D Views).
- Load the required dataset (see Importing Data).
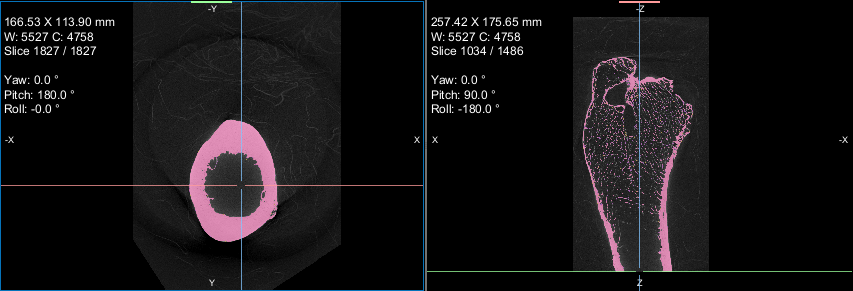
- Display the data in a multiple MPR and 3D layout, recommended.
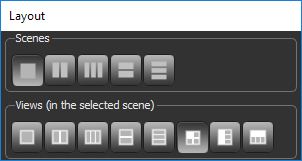
See Scene Layouts and Views for information about changing the layout of the views in a scene with the options in the Layout panel, shown below.
- Adjust window leveling with the W/L tool or in the histogram on the Window Leveling panel, as required (see Window Leveling).
You should note that it is often easiest to use the Area tool on the Window Leveling panel to adjust window leveling automatically in 2D views. Do the following to automatically optimize window leveling in 2D views:
- Click the Area
 tool on the Window Leveling panel.
 - Drag to define a rectangular area over the tissue of interest.

- Release the mouse button to apply the leveling values computed within the selected area.

- De-select the Area tool.
- Click the Area


In some cases, you may have to reorient your data so that the input bone specimen is in the correct anatomical orientation. The Move panel provides the tools necessary to quickly re-orientate data (see Translating and Rotating Objects). You can then derive a new dataset from the re-oriented view.
- Display the data in a multiple MPR layout, recommended.
See Scene Layouts and Views for information about changing the layout of the views in a scene.
- Select the view you plan to align.
- Click the Displace
 tool on the Move panel.
The Translate and Rotate tools appear in the selected view.
- Drag the Rotate tool, as shown below, to align the selected view with the anatomical axes.

NOTE You can use the Rotate tool in any MPR view of the selected dataset to make your adjustments.
- Do the following when you are satisfied with the reorientation:
- Make sure that the reoriented view is selected. A view is selected when its border is highlighted.

- Right-click the dataset in the Data Properties and Settings panel and then choose Derive New from Current View in the pop-up menu.
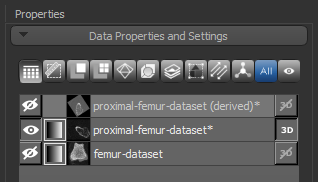
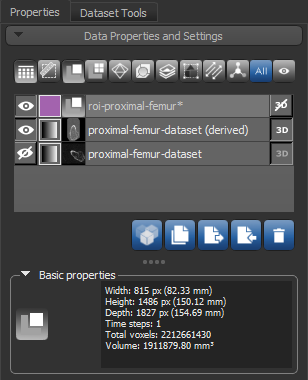
After processing is complete, the derived dataset appears in the Data Properties and Settings panel, as shown below.
- Make sure that the reoriented view is selected. A view is selected when its border is highlighted.


Cropping image data is an optional pre-processing step. However, cropping your data to the bone of interest will reduce the total size of the volume and should decrease processing time. In cases in which multiple bones are present, you can also use the Crop tool to isolate the bone of interest. The result of cropping can be either a new dataset that is a subset of the original or a cropped original (see Cropping Datasets).
- Display the original or derived dataset in a layout that includes multiple 2D views and/or a 3D view, recommended.
See Scene Layouts and Views for information about changing layouts.
- Right-click the dataset you want to crop in the top section of the Data Properties and Settings panel and then choose Crop in the pop-up menu.
The Dataset Cropper panel appears on the Dataset Tools tab on the right sidebar.

In addition, a clip box appears in the views of the dataset.
- Do the following, as required:
- Adjust the clip box in the 2D views of the dataset, as shown below. You should note that you can also translate the clip box, if required.

- Adjust the planes of the clip box in the 3D view of the dataset.

- Enter the required ranges for the X, Y, and Z axes in Min and Max edit boxes on the Dataset Cropper panel.
- Adjust the clip box in the 2D views of the dataset, as shown below. You should note that you can also translate the clip box, if required.
- Check the Create new dataset option on the Dataset Cropper panel, if required.
If checked, a new dataset will be created with the selected cropping. If not checked, the input data will be modified.
- Click the Apply button.


In some cases, you may need to filter your data to reduce noise or to enhance edges. You can also apply other operations to facilitate initial bone segmentations.
Side-by-side comparison of original versus preview of filtered image data

An initial bone segmentation is a required input for the Bone Analysis module to guide the automated cortical and trabecular segmentation process for computing morphometric indices and for computing mappings of anisotropy and volume fraction. In most cases, the initial bone segmentation region of interest can be extracted from a threshold range (see Thresholding) applied to the image data, as described below.
- Pre-process your image data, as required.
- Display the data in a multiple MPR layout, recommended.
See Scene Layouts and Views for information about changing layouts.
- Adjust window leveling, as required (see Window Leveling).
- Click the Segment tab on the left sidebar to access the ROI Tools panel.
- Do the following to create a region of interest with data values thresholded for bone:
- Make sure that the required image data is selected in the Data Properties and Settings panel.
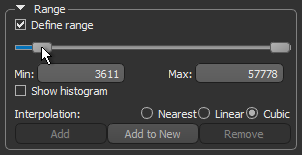
- Select the Define range option in the Range box on the ROI Tools panel, as shown below.
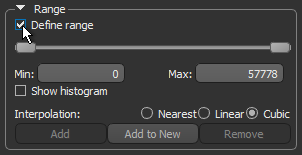
- Drag the left or right Range sliders to change the minimum or maximum values of the intensity range or enter the required values in the Min and Max edit boxes.
- Verify the selected range on other images in the image stack and in other views of the data, recommended.

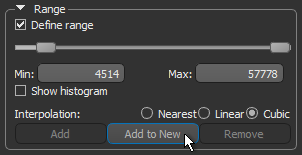
- Click the Add to New button to create a region of interest in which all voxels that fall within the selected range are labeled.
The new region of interest appears in Data Properties and Setting panel. Information about the region of interest is displayed in the lower section of the panel (see ROI Properties and Settings).
- Uncheck the Define range option in the Range box.
- Continue to the next section to learn how to refine the region of interest, if required.

In some cases, your initial bone segmentation may contain unwanted objects, such as mounting aids, stray pixels, and noise, or may be open at one end and must be sealed. These issues should be addressed before you continue a bone analysis workflow.
You can apply the Process Islands options to remove unwanted objects, as described below, or you can clean-up an initial segmentation in the Object Analysis dialog (see Analyzing Connected Components). You can also use the ROI Painter tools to manually edit a thresholded bone segmentation (see ROI Painter Tools).
- Right-click the region of interest in the Data Properties and Settings panel and then choose Process Islands in the pop-up menu.

- Choose the required sub-menu item (see Processing Islands).
For example, you can isolate the largest object or objects in the region of interest by choosing Isolate (6-connected) nth First Biggest and then selecting the number of objects you want to keep.
The first step in processing an initial segmentation of mineralized bone is to create a filled region of interest that fully describes the cortical and trabecular areas. To properly fill a bone segmentation, you must make sure that it is sealed on all sides. For example, a bone shaft that may be open at one end after cropping.
- Scroll to the image slice that shows the most proximal or distal view of the open shaft.

NOTE In some cases, you may have to create an oblique view to seal the segmentation (see Creating Oblique Views).
- Click the Segment tab on the left sidebar to access the ROI Tools panel.
- Select 2D mode on the ROI Painter panel.
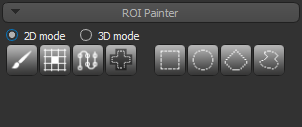
- Select the Brush
 tool and then a brush type — Round or Square.

- Close the open area on the proximal and/or distal slice as follows:
- Hold down Left Crtl, or your configured Add with key, on your keyboard. The cursor is now a painting brush.
- Change the diameter of the brush by rotating your mouse scroll wheel, as required.
- While holding down Left Crtl and your left mouse button, paint the area inside the region of interest.

NOTE You can remove areas from a region of interest by holding down Left Shift while painting.